Click here to check out the Overview.
Upload Video
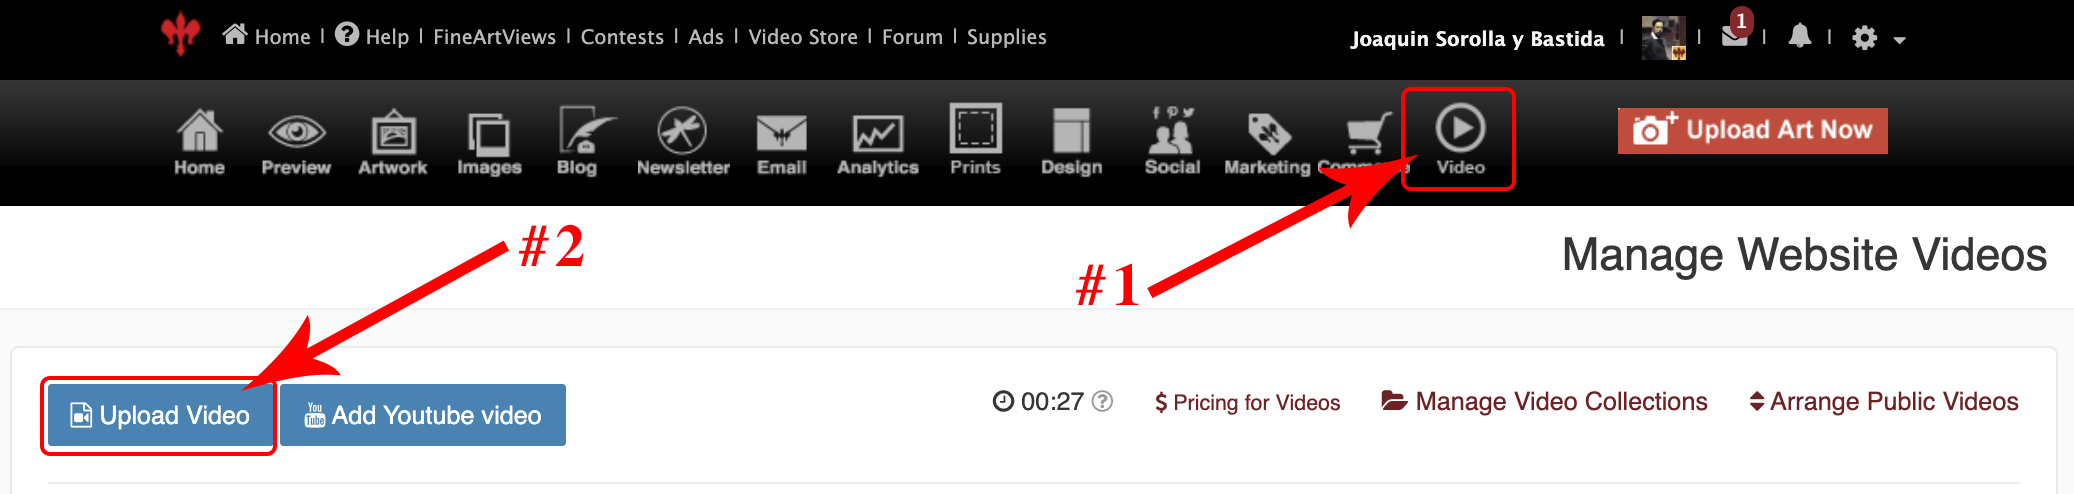
- Login to FASO Control Panel
- Click Video (upper right)
- Click Upload Video
NOTE: For info on uploading a Youtube video see: How to Add Off-Site Video or Slideshow Using Full Screen Mode
- Click on the blue box to select your video file on your computer.
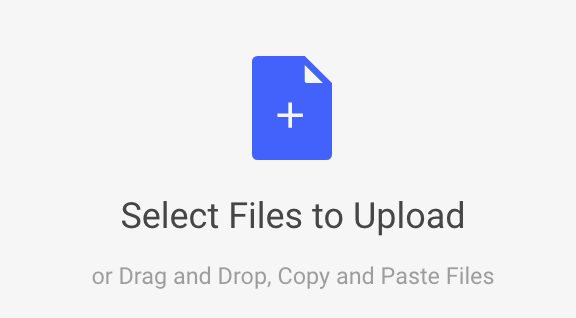
- Select the video file by double-clicking or by clicking Open (this varies depending upon your operating system)
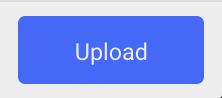
- Click Upload (blue button lower right)
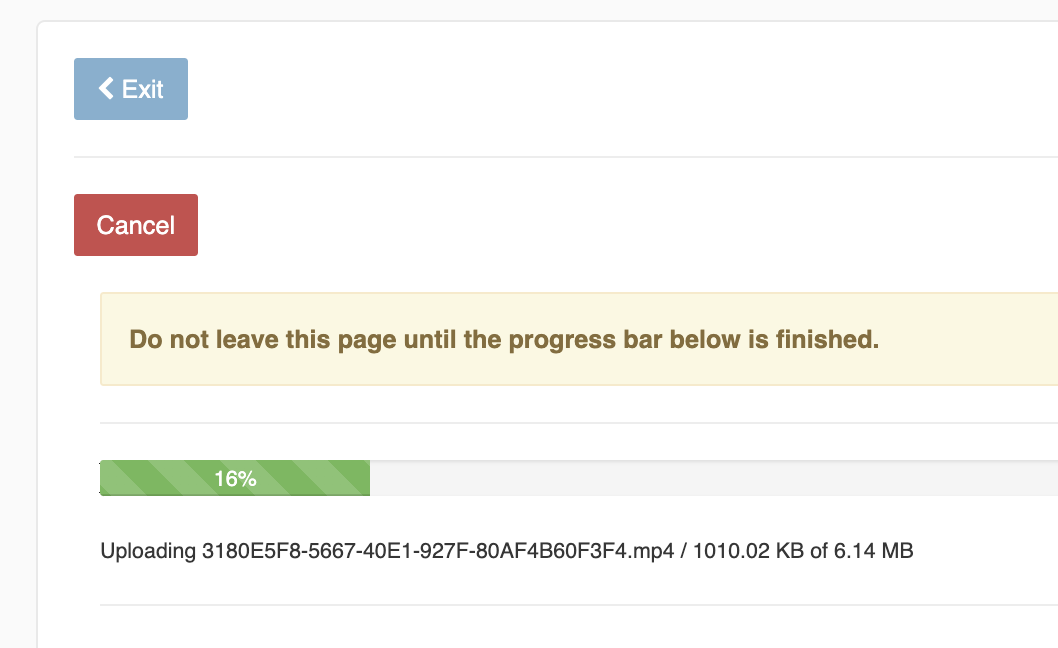
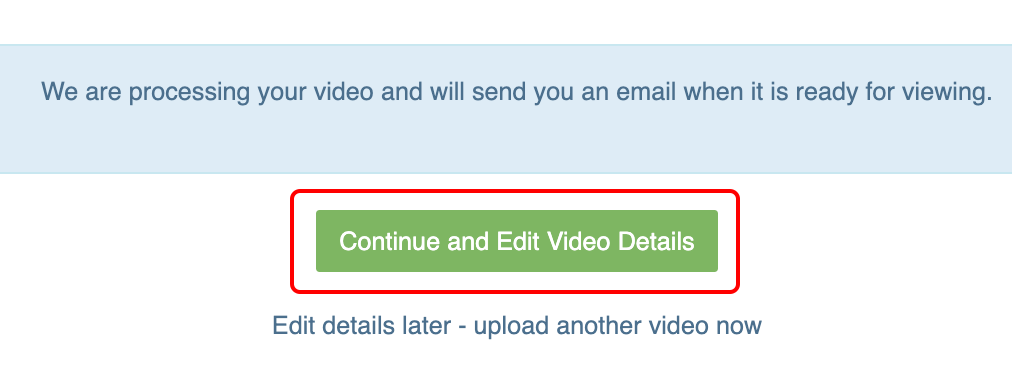
- Wait for video to upload. You'll see a green bar indicating upload process.
This can take a while depending on video length & your internet speed. Do not leave the screen.
- click Continue and Edit Video Details
Add Video Details
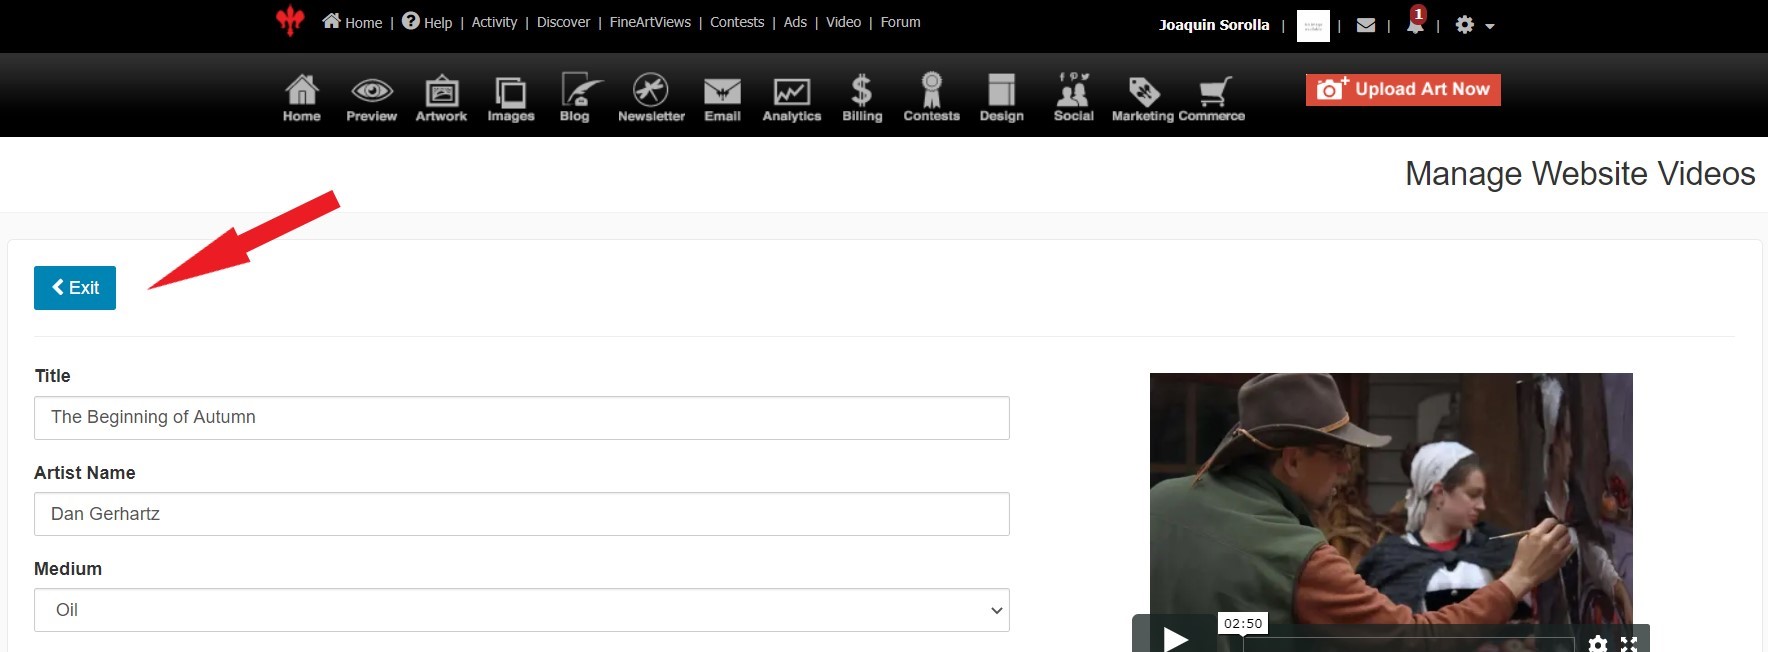
- Add Title
- Add Artist Name
The artist who this video is about. In most cases this will be your name. - Select Medium
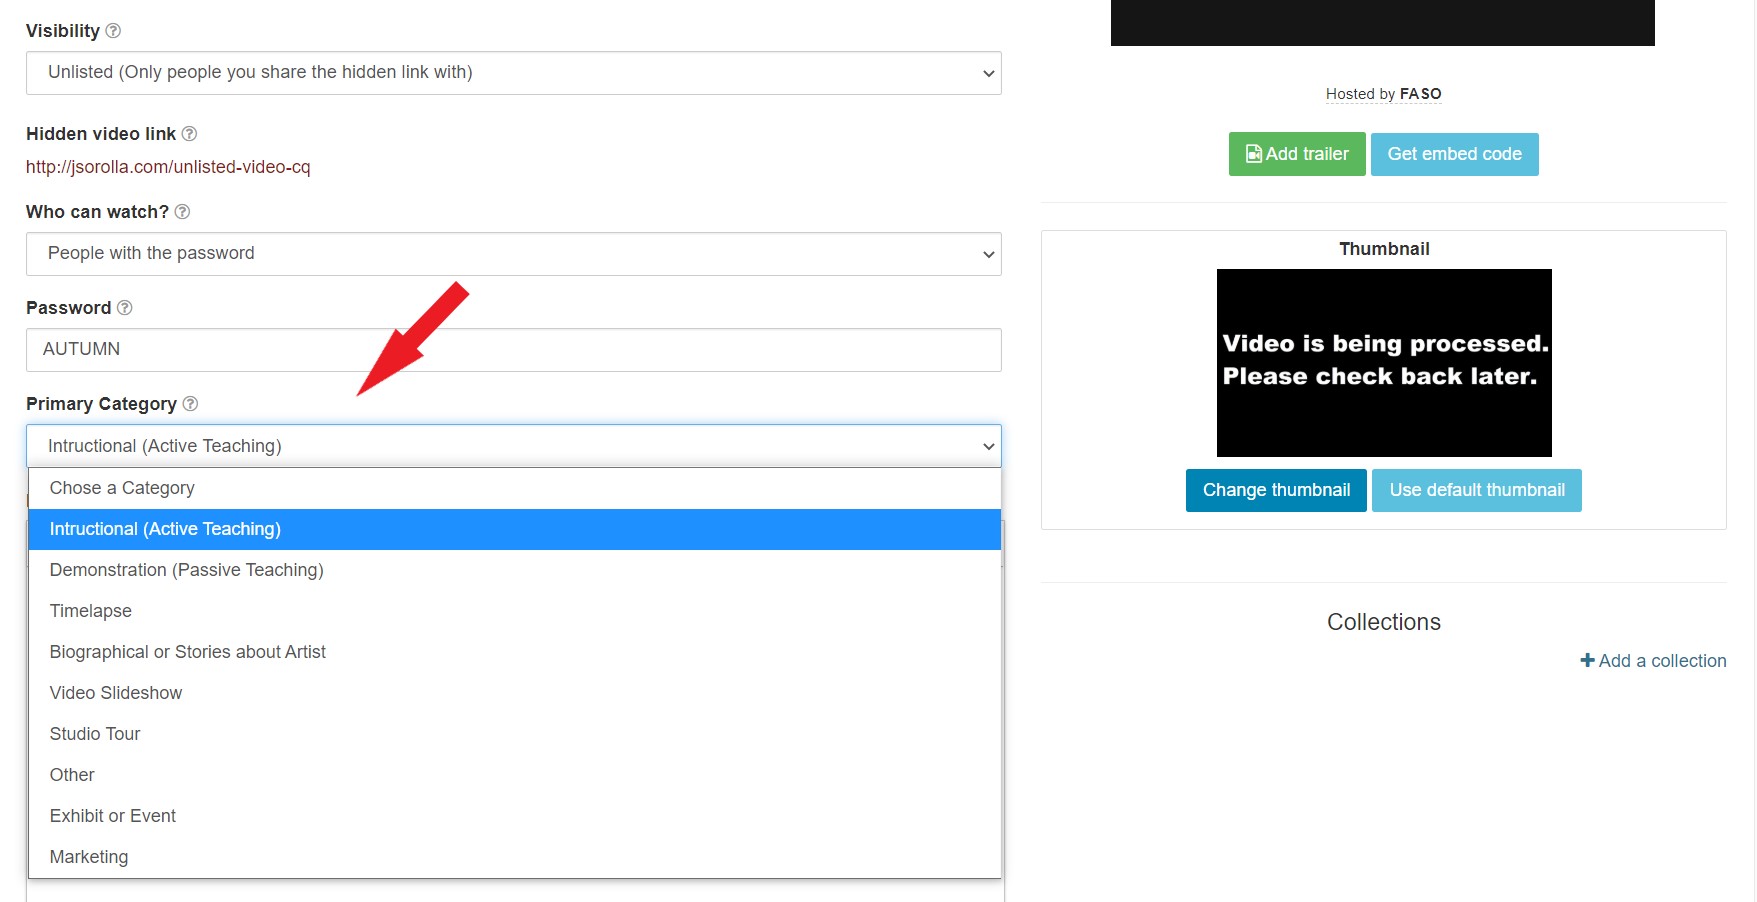
- Select Primary Category
- Add a Description
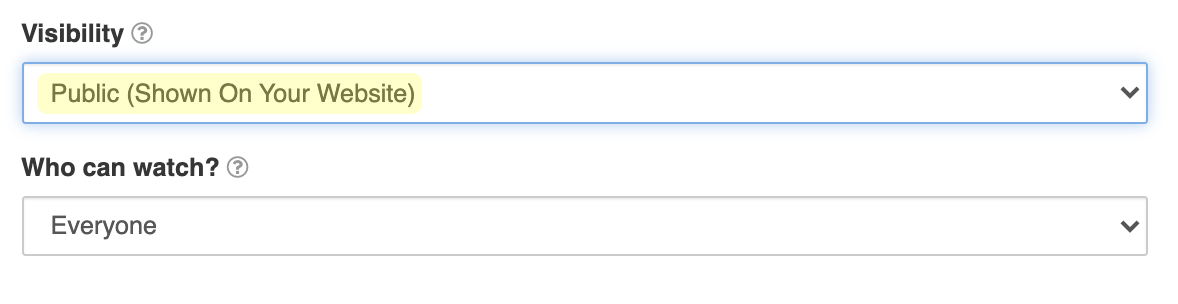
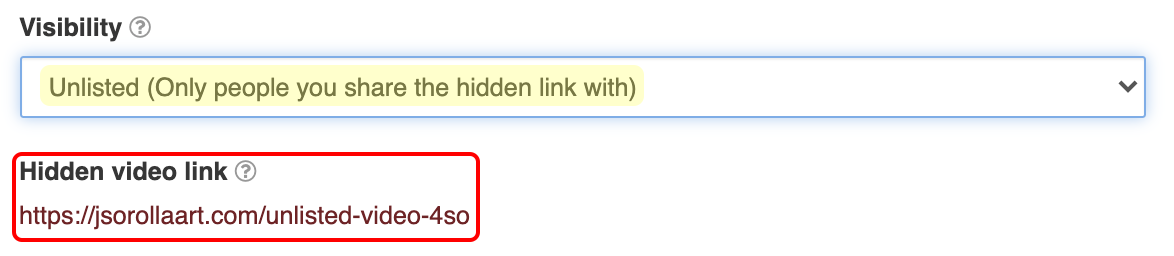
- For Visibility choose between
- Public (Shown On Your Website)
- Unlisted (Only people you share the hidden link with)
- Paid (Landing page shown on your website, full video at hidden link)
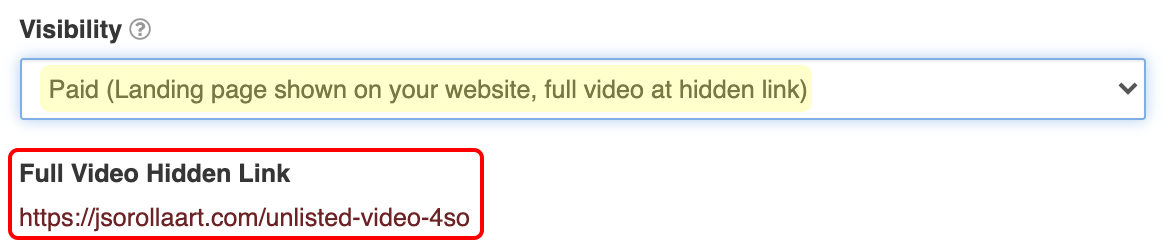
NOTE: When you select Paid an Add to Cart button is automatically placed on your live website. |
- For Who can watch? option choose People with the password if you want to password protect the video. Otherwise leave it as Everyone.
Once you select People with the password, enter a password for the video. - click Save

Optional - Add Trailer
Adding a trailer is only available for Paid videos.
It is not necessary to use a trailer. If you choose not to, the system will automatically show the video image on the landing page. Should you add a trailer later, that will be used instead of the image.
- on the Video editing screen
- for Visibility, make sure Paid is selected
- if not, select Paid
- click Save Changes
- click Add trailer button

Be sure you are adding the trailer via the green Add trailer button. |

- upload as before
- click Go to Video Details

Video are for Streaming Only
Videos are not downloadable. This service is for streaming only.
|
NOTE: Your buyer will lose access to your video if you delete the video. |
Replace Video
- from video editing screen
- click Replace full video (bottom right corner)
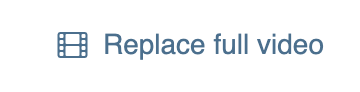
- follow the prompts to upload the replacement video
You cannot revert back to the original video after replacing it.
This does not apply to YouTube videos, only to those you uploaded directly to your FASO Control Panel.
(YouTube doesn't allow video replacements.)
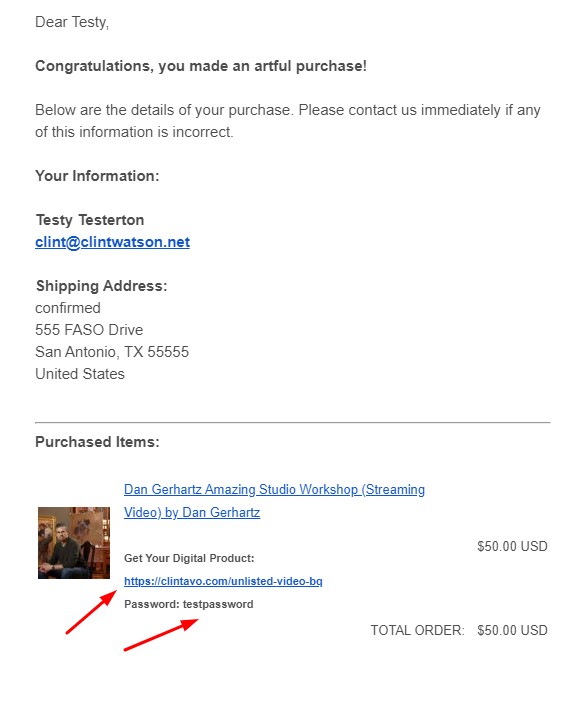
Sample Receipt with Password
Then your buyers receive the password in their receipt, such as in this pretend example:
- Select the Primary Category from the drop-down
- Paste your regular Description (copied from your special video document) into the text box. Perhaps welcome them, give the name of the video, describe what they'll learn etc.
- Check Paid Video (assuming it's not free) - now a field opens for Price*
- Enter the Price
*This will also create an extra text box for Paid Description - for info that only applies after a purchase is completed.
Why 2 Description boxes?
The regular Description (only says Description above the text box) is for marketing your video. Any sales talk goes in this upper text box. If it's a free video, then you add the general info here as this is the only Description they'll see in that case.
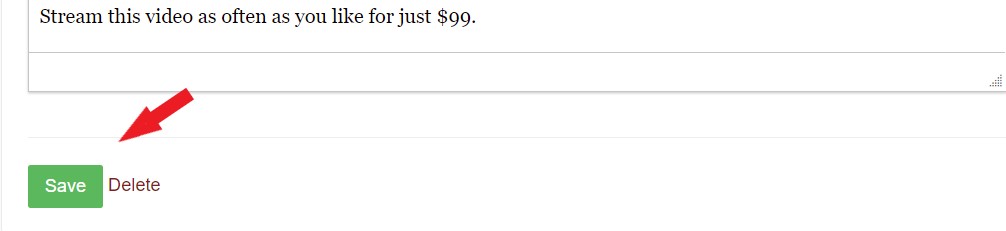
The Paid Description is only for those who have paid. You can thank them, give info that only they are privy to, etc.
For example, you could add a PDF link to the Paid Description box so that once your buyers have paid they would have access to a pdf file that goes along with the video. The download link for the PDF would be included in the receipt.
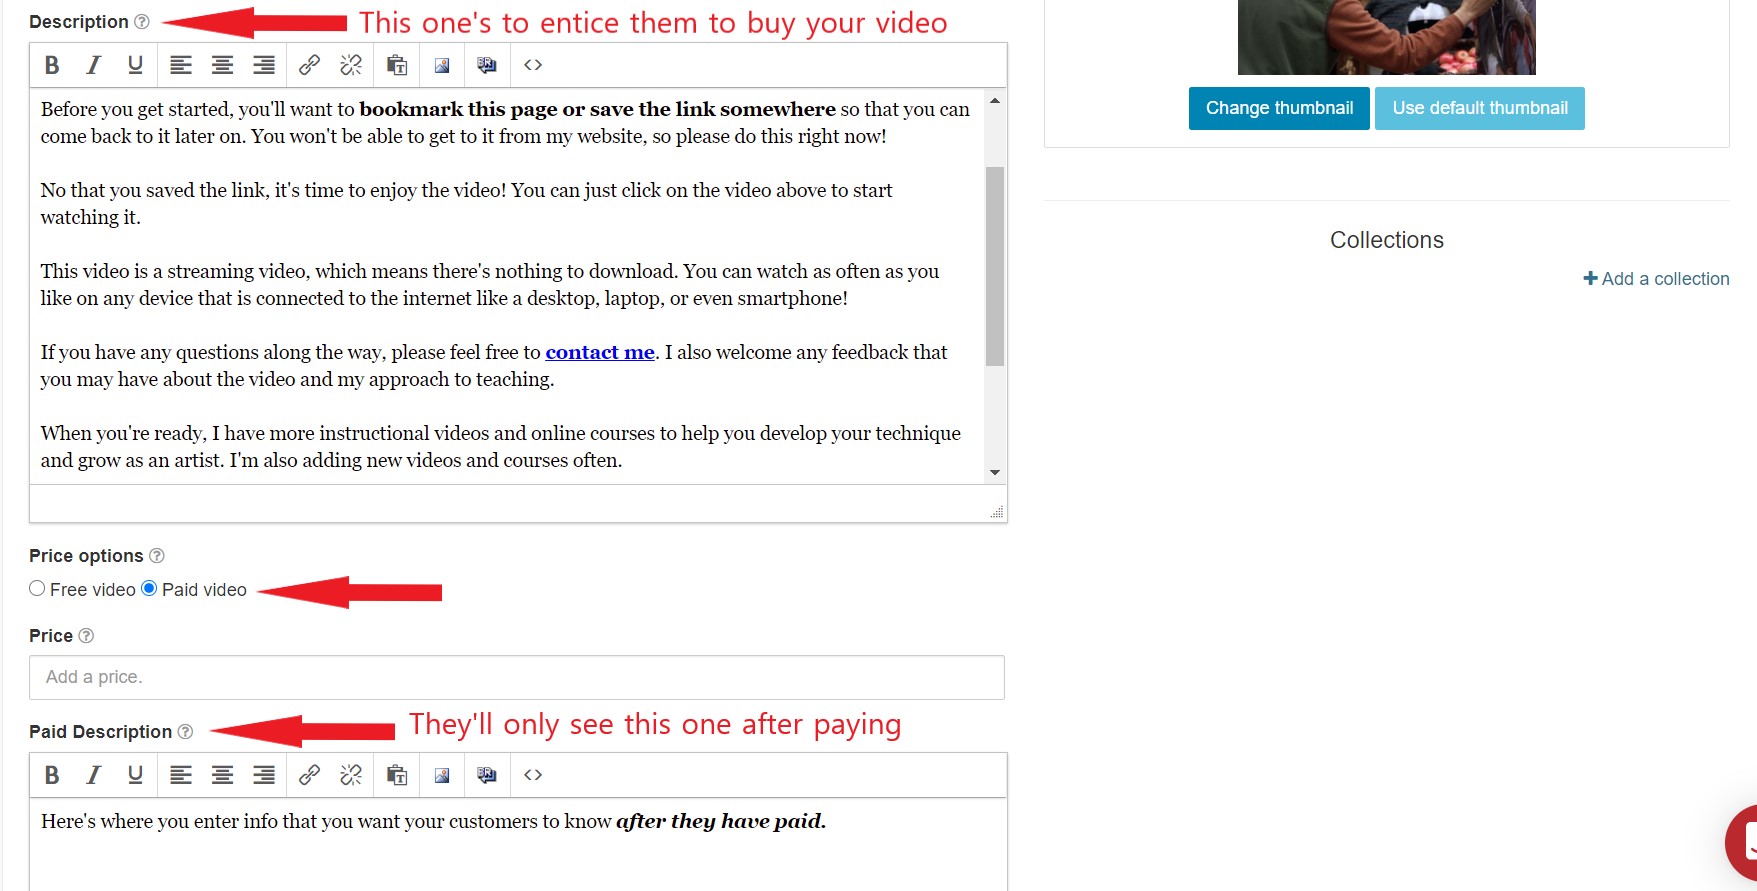
- Copy your text for the Paid Description and paste it into this box. Your buyers will only see this once they've paid and access your full-length video.
Pasting from Word
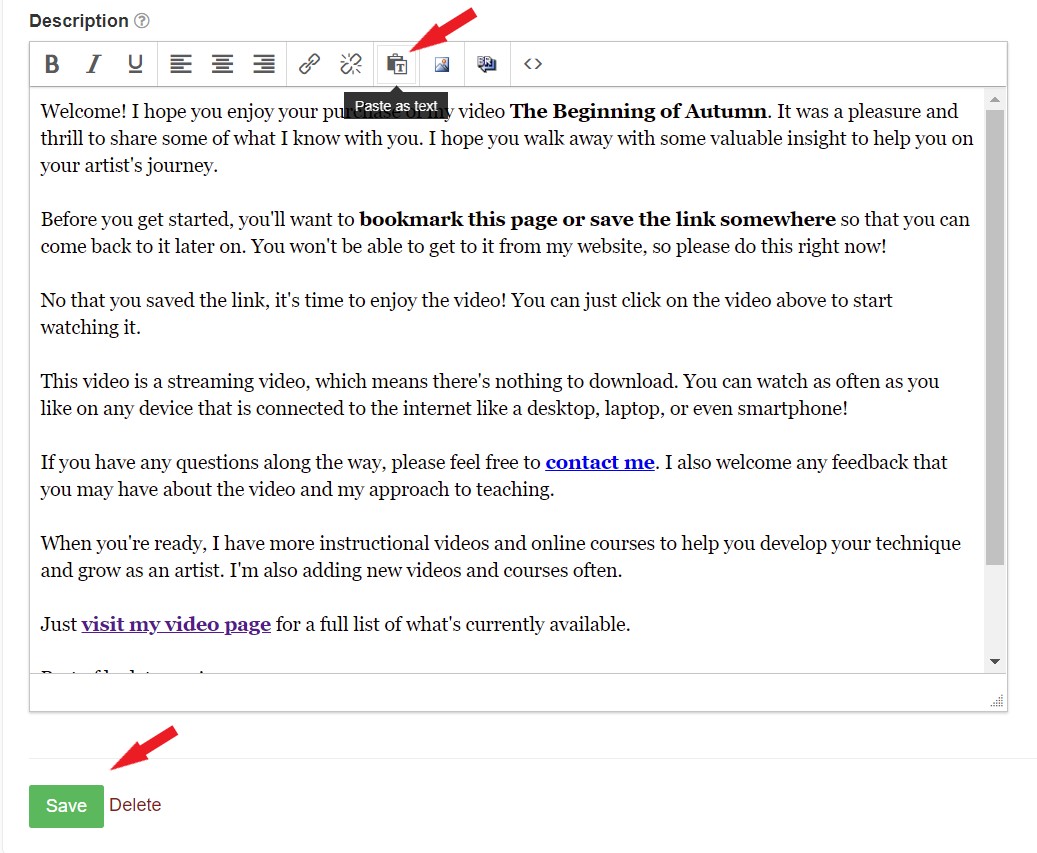
- Now highlight/select text you want to make Bold etc, & use the icons in the upper row
- Click Save (green button, bottom left)
- Click Exit (top left)
Add Video to Website
See this FAQ:
How do I add my uploaded video to my site?
04122022